How To Use Our Bleed Label Templates
How to use bleed label templates to create full colour backgrounds on your labels.
Here's our guide about how to use bleed label templates to create full colour labels.
What Sort Of Bleed Label Templates Do We Supply?
Our website features bleed label templates in Word and PDF formats. Word templates can be used with Microsoft Word or any word processing software that can edit .docx files (e.g. Pages). The PDF bleed label templates can be used with any graphics package that can edit .pdf files (e.g. InDesign, Illustrator, Photoshop etc).
As we explained in our previous post, our PDF bleed label templates will contain two outlines for each blank label. The solid black outline indicates the size and shape of each label. The dotted grey outline indicates the bleed area around each label.
The bleed area is a blank space around your sticky labels that you can use to overlap your design to prevent white edging when you print your sticky labels. Instead of finishing at the edges of each blank label, your design will end within the bleed area – meaning that it overlaps the edges of your blank labels.
Our Word bleed label templates contain areas that represent the blank labels themselves AND the bleed area around them.
How Do You Use Bleed Label Templates?
Essentially, you use our bleed label templates in exactly the same way as you would our standard label templates.
The only thing you need to bear in mind is where the edges of your design fall. Your design should extend outside of the blank labels so that it ends somewhere within the bleed area. You can set up your design so it finishes partway into the bleed area or fills the bleed area entirely. The only thing that matters is that your design overlaps the edges of your blank labels.
Using Word Bleed Label Templates
In a standard Word label template, your design should fit inside the cells representing each blank label.
Word label templates are basically tables where the cells represent your blank labels and any gaps in the layout of each A4 sheet. This means that round labels are represented by a grid of squares and oval labels by a grid of rectangles.
Standard desktop printers can only provide so much accuracy when aligning label templates onto sheet labels. This means that if your design includes a full colour background, logo, or image you may get white edging around some of your sticky labels where your design isn’t quite perfectly aligned. While you can adjust your template and printer settings to improve the alignment, it is very difficult to align a whole sheet perfectly. Instead, you can use a bleed label template to oversize your design to prevent white edging appearing at all.
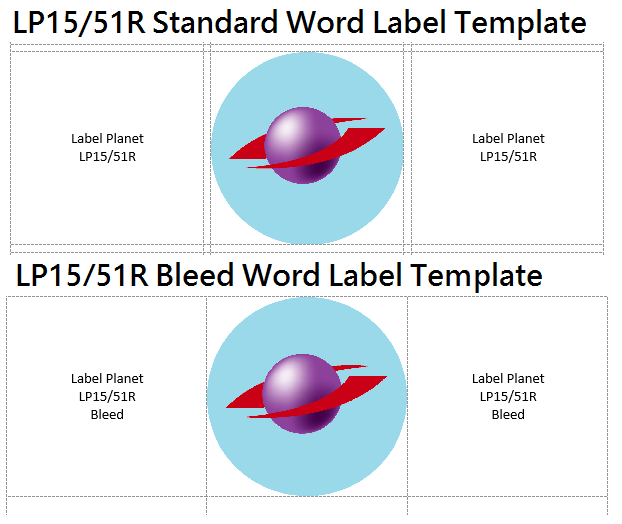
In the image below, we have added a colour logo to a row from a STANDARD label template and a BLEED label template for our LP15/51R round label size.

In the standard label template, the design touches the four sides of the cell. This means the design fits within the label itself. With this template, you would probably get some white edging around some of your labels.
In the bleed label template, however, the same logo has been resized slightly to fill the larger cell. In this template, each cell represents a blank label and its bleed area. By filling the cell, the blue background will overlap each label slightly, preventing white edging from happening when you print the completed template.
Remember, when working with images in Word, you will need to adjust the Wrap Text format option to give you greater control over the positioning of your images. Left click on your image once to select it. Click on the Picture Tools Format tab at the top of the page. Click on Wrap Text and choose Tight (or In Front Of Text). If you have multiple elements within your design, you will need to use the “Bring Forward”/“Send Backward” options to layer your elements as needed. Remember that the table used to create your label template is a layer in itself so you need to make sure that your design elements sit in front of it – or they may disappear from view!
Using PDF Bleed Label Templates
Likewise, you would use our PDF bleed label templates in much the same way as our standard PDF label templates.
Instead of making sure that your design sits within the solid black border outlining each label, however, you would simply need to make sure that your design finishes between the solid black border and the dotted grey border that outlines the bleed area.
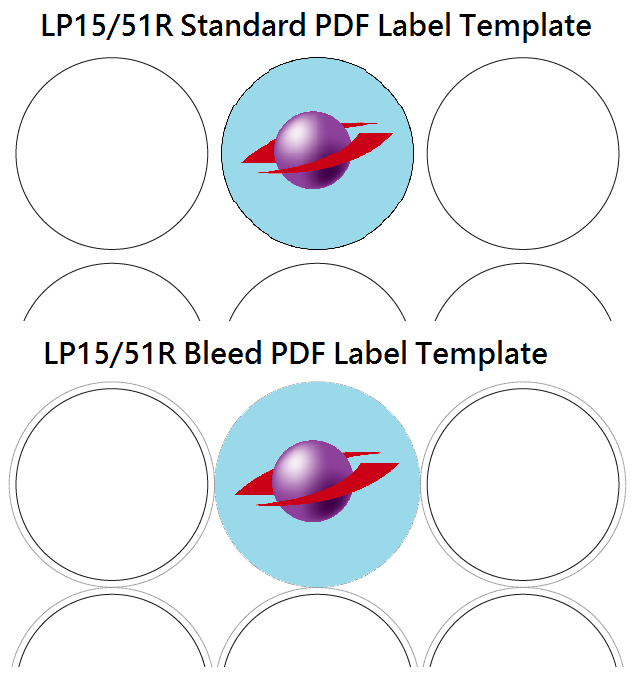
In the image below, we have added our colour logo to a STANDARD label template and a BLEED label template.

In the standard label template, the design sits within the black border that indicates the shape of the blank label. As with the standard Word label template, it would be extremely tricky to perfectly align every single label.
In the bleed label template, we have resized the design slightly. It now extends beyond the black border (representing the label) to touch the grey border (representing the bleed area). This means that the blue background will overlap each label slightly and prevent any white edges appearing when you print the completed template.
 Label Planet