Designing A Label Template – How To Create Window Stickers Using A Mirrored Design In Word
How to create window stickers using mirrored label designs.
A mirrored design is simply a design shown in reverse, which can be printed onto transparent labels that will be stuck onto one side of a glass object (e.g. a window) and viewed from the other side.
Some printers actually offer a “mirrored” or “reversed” print setting, which will take a standard (non-mirrored) template, reverse it, and print this reversed version onto your labels. If, however, you don’t have this option available to you, you will need to create a mirrored template.
While graphics packages (such as Indesign, Photoshop, Illustrator etc) will allow you to easily manipulate your design to create a mirrored template, it isn’t always as straightforward when it comes to finding the right tools in Word.
Basically, what you need to do is to flip or reverse the items in your label design to create a mirrored or reversed version.
NB: remember, you only need to do this for items that include some element that needs to be viewed in a specific direction; e.g. text, arrows, or images containing text.
There are TWO ways to mirror an item in Word (depending on the type of item you need to mirror):
FLIP
This is the quickest method; you simply left click once on your item to bring up the relevant “Format” tab at the top of the page (i.e. Picture Tools for images and Drawing Tools for shapes, text boxes, and WordArt), then click on the “Rotate” tool in the “Arrange” section and select “Flip Horizontal”.
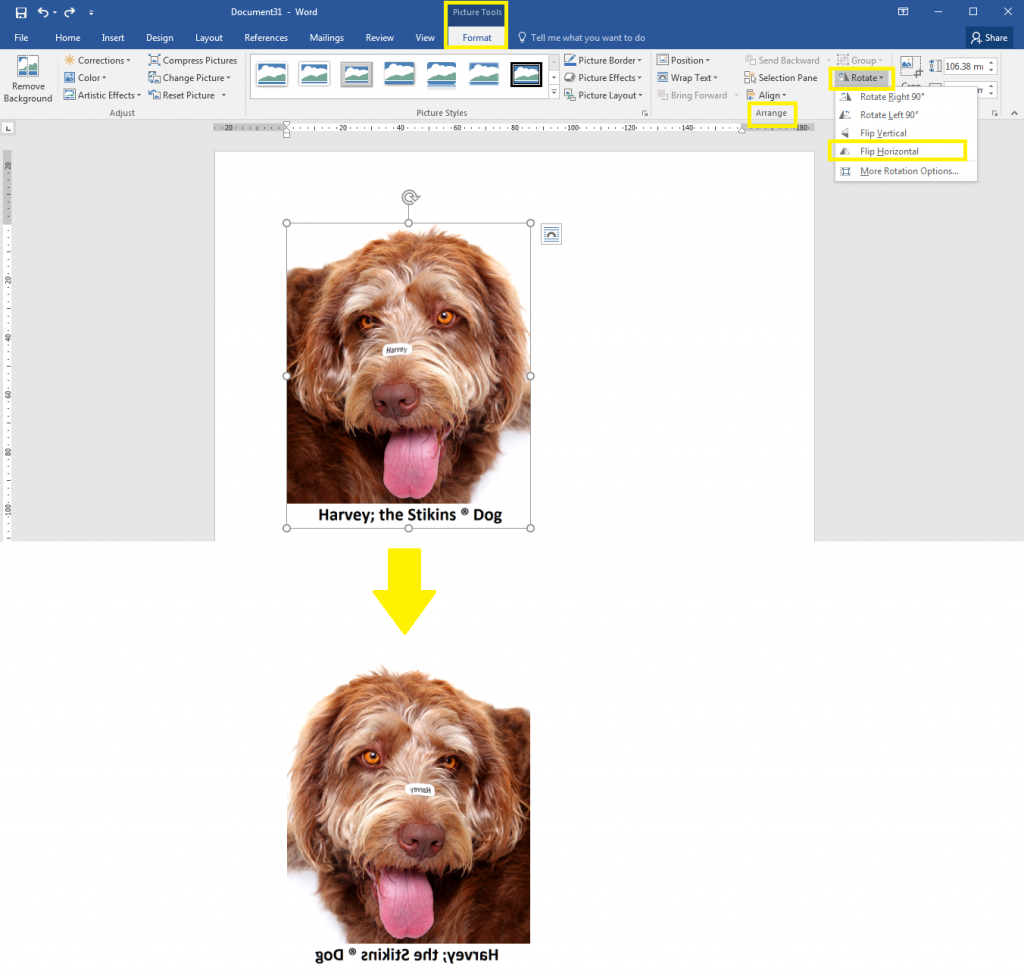
The only problem with this method is that it doesn’t work for items like text boxes and WordArt; if you use this tool on these items, it will simply flip the text box that contains your text or the background to your WordArt and not the text itself.
ROTATE
This method involves a few more steps BUT can be used on images, shapes, text boxes, and WordArt. First you left click once on your item to bring up the relevant “Format” tab at the top of the page, and follow these steps depending on the item you are reversing:
IMAGES:
Click “Picture Effects”, then “3-D Rotation”, and select “3-D Rotation Options” – change the value of “X Rotation” to 180.
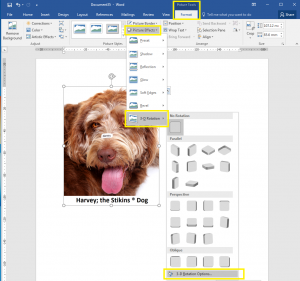 |
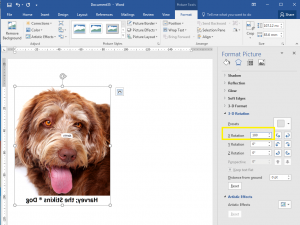 |
SHAPES:
Click “Shape Effects”, then “3-D Rotation”, and select “3-D Rotation Options” – change the value of “X Rotation” to 180.
WORDART & TEXT BOXES (to mirror the text AND its background):
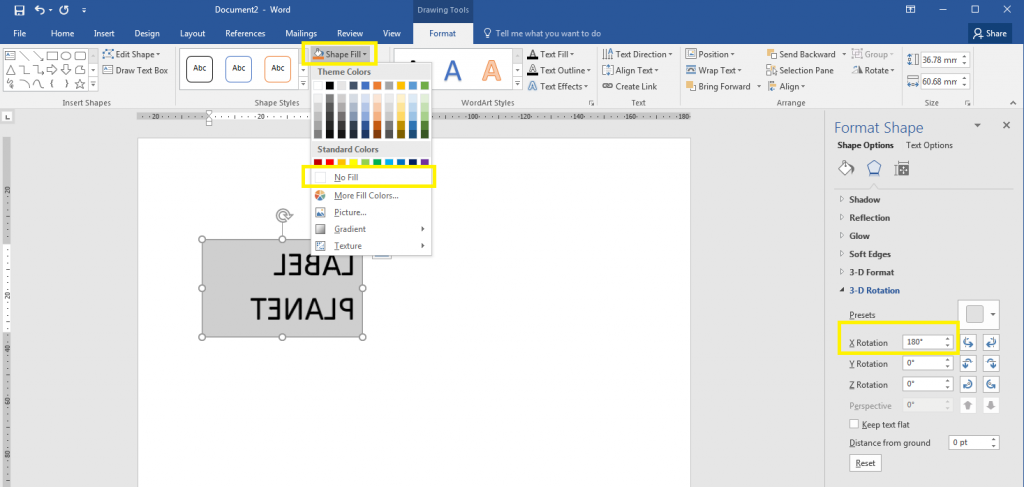
Click “Shape Effects”, then “3-D Rotation”, and select “3-D Rotation Options” – change the value of “X Rotation” to 180.
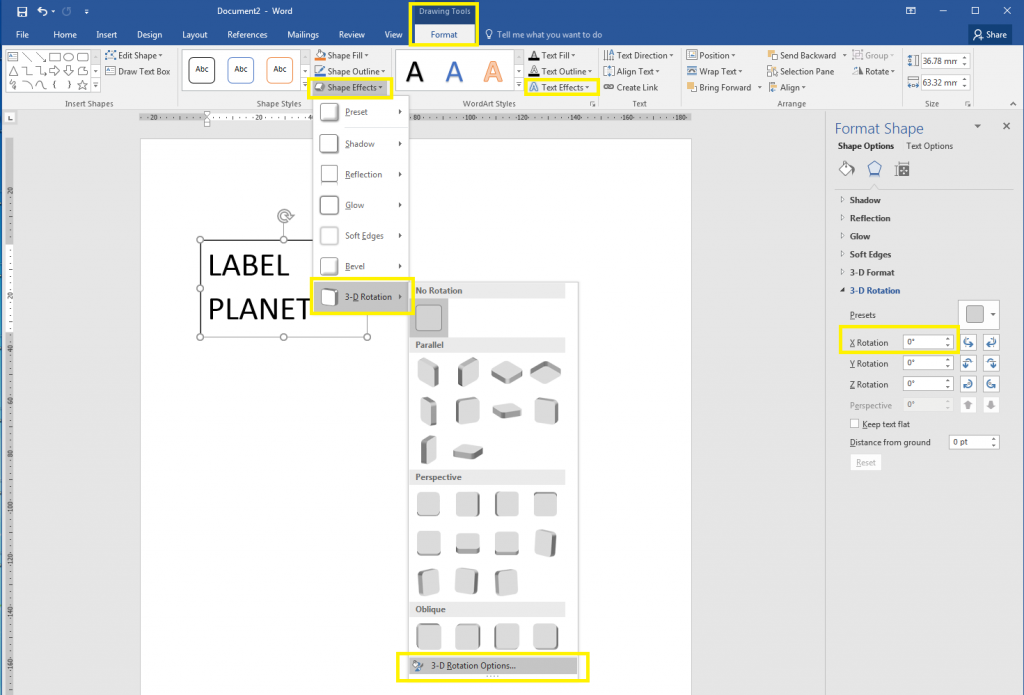
NB: if you haven’t added a background to your text box, you may find that following these steps adds a pale grey background to your text. To change this back (or to add a background), you will need to click on the “Drawing Tools Format” tab at the top of the page, click on the “Shape Fill” option in the “Shape Styles” section of the ribbon, and select the colour you want to use for the background of your text box (if you don’t want ANY background colour, then choose “No Fill”).
WORDART & TEXT BOXES (to mirror the TEXT ONLY):
Click “Text Effects”, then “3-D Rotation”, and select “3-D Rotation Options” – change the value of “X Rotation” to 180.
After reversing a text box or WordArt, the text will automatically be reversed back to its “normal” direction when you left click on it once (allowing you to read the text properly while you make changes) before returning to its reversed form when you click outside of the item.
 Label Planet