Designing A Label Template – When & How To Use A Bleed Template
Our guide to when and how you should use bleed label templates.
If you’re creating a label design that uses a full colour background you can sometimes end up with white edging around the edges of your labels where your printer hasn’t quite managed to line up your template perfectly with your labels. While you COULD try to fix this by manually adjusting your template, it’s more than likely that this is actually a near-impossible task, which makes it much quicker and easier to produce your labels by oversizing your design slightly to prevent any white edges from appearing at all.
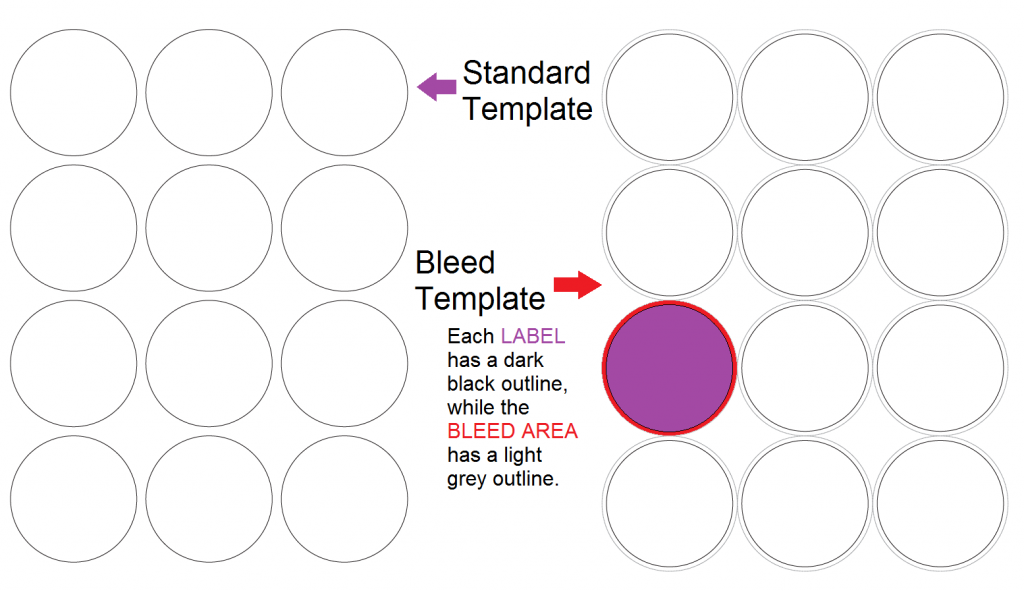
This means that the outer edges of your design will sit outside the edges of your labels – in other words, your design “bleeds over” into the non-label areas of your label sheets. While you CAN achieve this effect using a standard template (and simply oversizing your design as needed), you can also use a purposely designed “Bleed Template”, which will have a “bleed area” included around each label in the template.
There are a few different ways that this bleed area can be created but to keep things simple, we’ll take a look at the ways WE have created bleed areas in our bleed templates.
PDF TEMPLATES
In our PDF templates, each label is represented by a solid black outline and the bleed area around each label is outlined by a dotted grey line (meaning that the “bleed area” is the area between the solid black line outlining the label and the dotted grey line outlining the extent of the bleed area).

WORD TEMPLATES
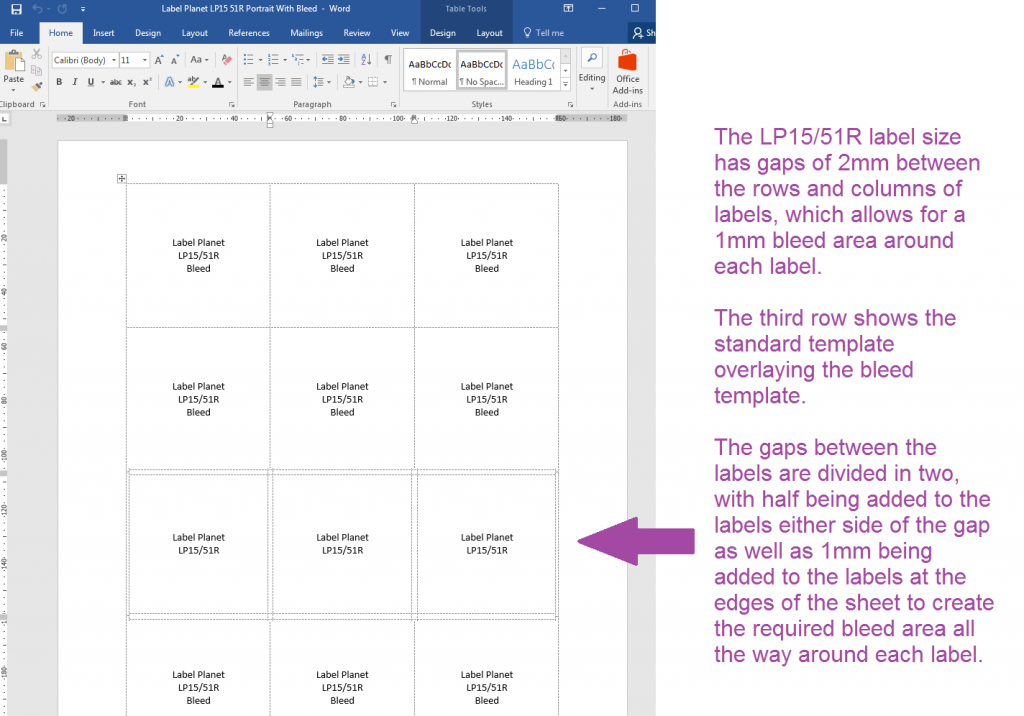
In our Word templates, we have merged the bleed area with the area that represents each label on a sheet; in some cases, where the gap between each column of labels is larger than the gap between each row of labels, there will still be a blank column representing the gap between the labels (and their respective bleed areas), but most of our bleed templates will not show any gaps between the labels. Generally speaking, therefore, the areas that are outlined in these templates show the labels themselves COMBINED with their respective bleed areas.

SO, WHEN & HOW SHOULD YOU USE A BLEED TEMPLATE?
You should use a bleed template if you want to create a label design with a coloured background (e.g. with a coloured background, full size image, or a border) AND the label size you are using has gaps between and around each label.
It is possible to use bleed with labels that don’t have gaps between and around each label BUT only if your design is consistent around its edges; you can simply oversize your design in a standard template to avoid white edging BUT if your design changes colour and the edges do not match then you may end up with inconsistencies in your printed labels. For example, if you oversize a photo of a landscape (where the background shifts from blue sky at the top to green fields at the bottom), you may end up with the bottom edge of the landscape printing onto the top of the label below it (so you have a green edge where it should be blue).
This also means that you can’t create specific bleed templates for these label sizes and layouts; you would end up placing bleed areas within areas that represent actual labels on your sheet, which would obviously cause problems when you try to add your design to these overlapping areas.
For each of our label sizes where it is possible to create a bleed template, we have tried to include as much bleed area as is physically possible on that particular label size and layout. This is determined by taking the size of the gaps between the rows and/or columns of labels and halving this measurement. As shown above in our LP15/51R Word Bleed Template, the gaps between the rows and columns is 2mm, which allows for a bleed area of 1mm all the way around each label. Where the gaps between the rows and columns differ in size, we take the smaller measurement; for example, in our LP24/45R label size, the gap between the rows of labels is 3mm and the gap between the columns is 4mm – in order to create a CONSISTENT bleed area all the way around each label, we take the smaller measurement (3mm) to determine that the bleed area available for this label size is 1.5mm.
When using a bleed template, you simply need to add your label design to the template so that the outermost points of your design fall into the bleed area provided. While you DON’T have to fill the bleed area, you DO need to make sure that your design doesn’t extend beyond the limits of the bleed area (otherwise it may end up creeping onto another label) AND that any important elements within your design don’t fall into the bleed area (otherwise they will be cut off).
In other words, if your design contains important elements at the very edges of your labels you will need to extend your design so that these elements remain within the labels themselves, while the extended area falls into the bleed area and can be safely discarded.
When using Word Bleed Templates, you will need to take additional care because they only show the combination of each label and its bleed area (i.e. they do not show where a label finishes and the bleed area starts); this means that you will need to CENTRE your design (so that its edges fall into the bleed area) and – as always – we strongly recommend doing a test print of your template onto paper so that you can double check if your design will be printed correctly (and make amendments if necessary).
 Label Planet