Designing A Label Template – How To Select (Highlight) Content In Word
How to select items or content you are using to create your label design.
This blog post is all about how to select (or highlight) items and content – using Word as an example.
Selecting Items
To select an item you simply need to left click on it once using your mouse; however, depending on the item you need to select, you may need to click in a specific position on the item to select the entire item (rather than just an element within that item).
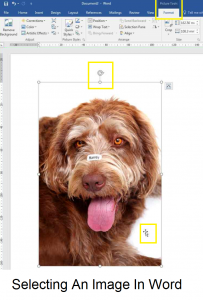
For example, if you need to select an image or a shape, you can click ANYWHERE within that item to select it. The cursor will change to a white arrow with a four headed black arrow behind it, “sizing handles” (round circles) will appear at the four corners and in the middle of the four sides of the item, and the relevant Format tab will be displayed at the top of the ribbon (for images this is the Picture Tools format tab and for shapes it is the Drawing Tools format tab).
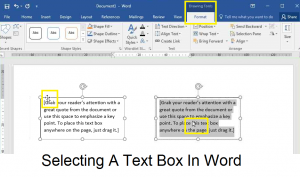
When selecting a text box, however, your cursor must be positioned over one of the edges of the box (and in the shape of a white arrow with a four headed black arrow behind it) to select the whole text box. If you click within the text box (with the cursor as a plain white arrow), you will be selecting the TEXT within the box and not the box itself.
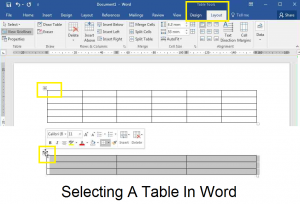
Likewise, if you want to select an entire table, you will need to place your cursor over the box containing a black four headed arrow at the top left of the table. Your cursor will turn into a white arrow with a black four headed arrow behind it and (once you have left clicked to select the table) the table will be highlighted by a light grey background to indicate that the ENTIRE table has been selected.
 |
 |
 |
Selecting Multiple Items
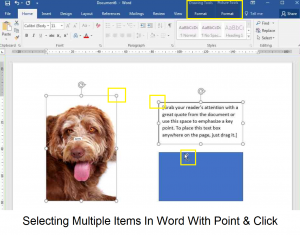
To select multiple items you simply need to hold down the Control Key (Ctrl) [Windows] or Command Key (⌘) [Mac] as you left click on each item in turn. As each subsequent item is selected the sizing handles will appear at the four corners and along the four sides and your cursor will take the shape of a white arrow with a plus sign and a rectangle shape behind it.
NB: if one (or more) of the items you are selecting is an image you will need to change the default Wrap Text format from “In Line With Text” to “Tight” or “In Front Of Text” before you can select the image along with other items. To do this you simply left click on the image to bring up the Picture Tools Format tab at the top of the page, click on Wrap Text, and select “Tight” or “In Front Of Text”.
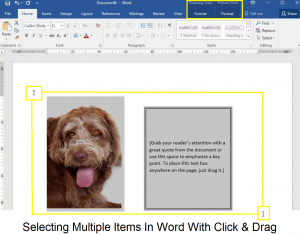
Alternatively, you can place your cursor above and to the left of the first item you want to select, click and hold down the left button on your mouse as you drag your cursor so that it is positioned below and to the right of the last item, and then release the button. This will highlight all of the items that fall within the area outlined by your starting and finishing positions – so you can cut or copy these items although you won’t be able to move them as you would if you selected them using the point and click method described above.
 |
 |
Selecting Text
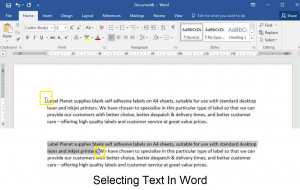
You can select text using the click and drag method described above; simply position your cursor at the start of the text you want to select, click and hold down the left button as you move your cursor so that it is positioned at the end of the text you want to select, and then release the button. The text you have selected will now be highlighted by a light grey background.
Selecting The Contents Of A Table Cell
When creating a label template for labels on sheets, we strongly recommend creating your design in the top left label and then using copy and paste to fill in the rest of the labels. This means you need to be able to select your design from the first cell in a way that copies not only the content itself but also any formatting options you have used to create that particular design.
The best way to do this is to:
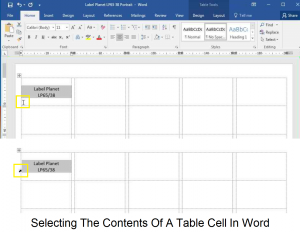
- Move your cursor into the bottom left corner of the cell you want to select. Quickly triple click the left button to select the contents of the cell (which will be highlighted by a light grey background).
- Alternatively, you can move your cursor to the left hand side of the cell you want to select until the cursor turns into a small solid black arrow pointing diagonally up and right. Left click once to select the contents of the cell (which will be highlighted by a light grey background). This method isn’t always available (it depends on how the label template you are using has been formatted) and it can be tricky to get your cursor in precisely the right position to turn it into the small solid black arrow.
Selecting Multiple Cells (To Paste Content)
When filling in the rest of your labels you can simply paste your design into each cell one by one (left click inside a cell once to select it). This method is fine if you only have a few labels per sheet BUT can become quite time consuming if you have a lot of smaller labels to fill in.
In this case you can select all of the cells (if there are NO gaps between the labels) using the click and drag method; position your cursor in the top left cell, click and hold down the left button as you move your cursor to the bottom right cell, and then release the button. All of the cells will be selected and highlighted by a light grey background.
If there ARE any gaps between the labels you CANNOT use this method as it will add your design to the gaps (as well as the labels themselves), which will destroy the alignment of your template.
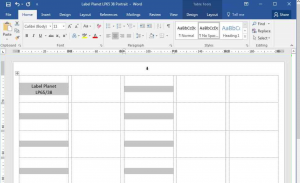
In this case, you might be able to speed up the process by selecting entire columns using the point and click method; position your cursor at the top of a column until it turns into a small solid black arrow pointing downwards and then left click once to select the entire column. You can select multiple columns by holding down the Control Key (Ctrl) [Windows] or Command Key (⌘) [Mac] as you click above each column. Each cell within a selected column will have a strip of a light grey background going through it (see below). You cannot use this method if there are gaps between the rows of labels as well as between the columns (see next week’s post for further information).
Remember you can download a template and get more help and advice from our Label Templates Home Page.
 Label Planet