How To Use Copy & Paste To Complete Label Templates As Accurately & Efficiently As Possible!
Our guide to using copy & paste to complete label templates accurately and efficiently.
Why Is Copy & Paste A More Accurate & Efficient Way To Complete Label Templates?
Watch a video: this advice is also available in video format.
View our step by step How To video to learn how to complete label templates using copy and paste.
Copy and paste allows you to complete label templates much more quickly and accurately compared with setting up your label design from scratch in each label in your template. This is because…
- Instead of having to spend time setting up your design from scratch in each label, you can instantly add your design to another label – or even multiple labels – with a couple of clicks.
- All of your labels will contain the EXACT SAME design (including the same formatting and layout); if you set up each label from scratch, it is possible for slight variations to creep in, which can make it harder to get an accurate alignment on all of your labels when you come to print your template.
How To Use Copy & Paste To Complete Different Layouts In Label Templates
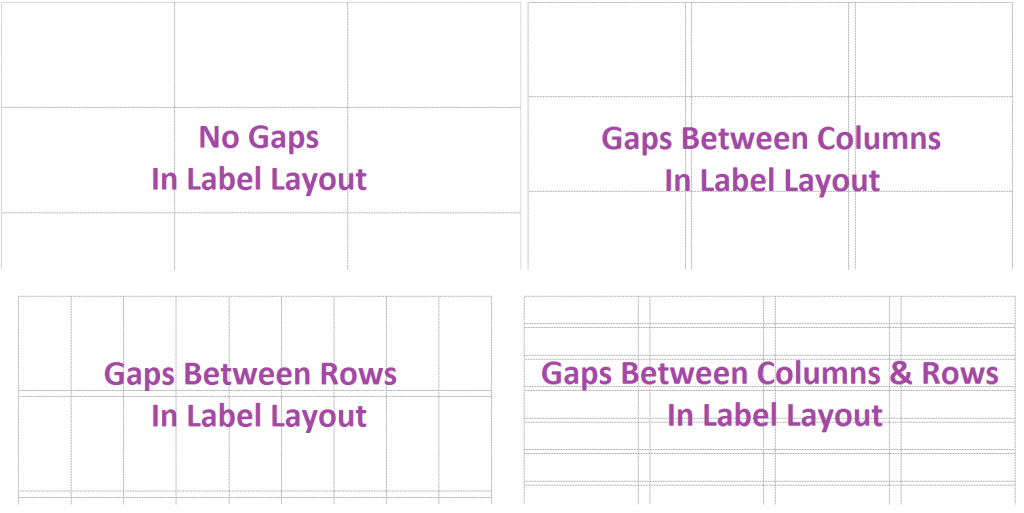
This process depends on your software and the layout of your labels (specifically if there are gaps between the rows and / or columns of labels). If your software allows you to select multiple individual labels at once, you can simply select the labels you want to fill and paste your design. If your software relies on selecting adjacent elements (like columns or rows in a Word template), you need to avoid selecting areas that represent gaps – otherwise you will end up printing your design into the spaces between your labels, ruining the alignment of your template.

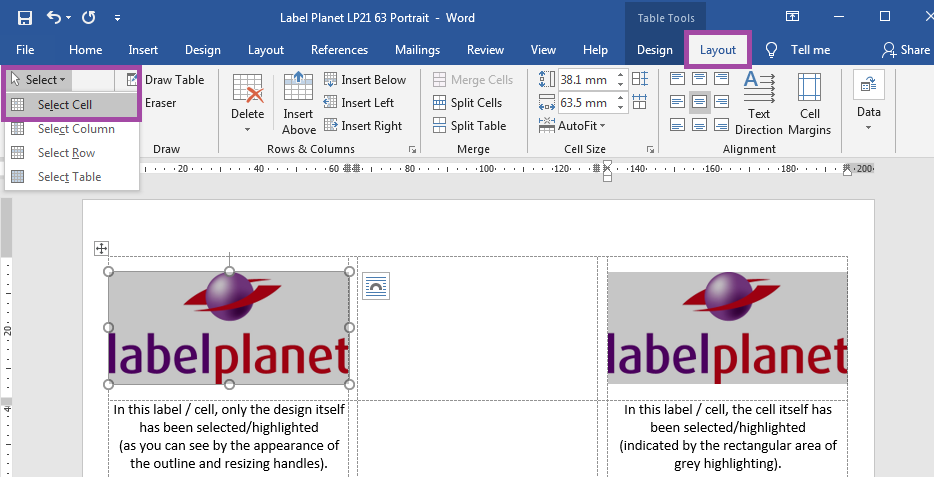
First, add your design to the first label in your template. Next, select that label and copy it. You must select the label itself (including its contents) and not just the design you have added.
In Word label templates, it is possible to select only the content you have added to a label and not the label itself. This only copies the content and not all of the formatting and layout options you have used to create your design.
To select a cell in Word, you can either use click and drag, triple click, or select cell. To use click and drag, you simply move your cursor to the top left corner of your label, click and hold down the (left) button and you drag your cursor to the bottom right corner of your label before releasing the button. To triple click, move your cursor to the bottom left corner and triple click quickly. Alternatively, click inside the cell (or click inside an adjacent cell and use the arrow keys on your keyboard) to move your cursor inside the cell, select the Table Tools Layout tab at the top of the page, click on Select, and choose Select Cell.

Copy your label using the Copy menu in your software or using a keyboard shortcut (Windows: Ctrl + C / MacOS: ⌘ + C).
Next, you need to select the labels into which you will add your copied design.
Word Label Templates With No Gaps
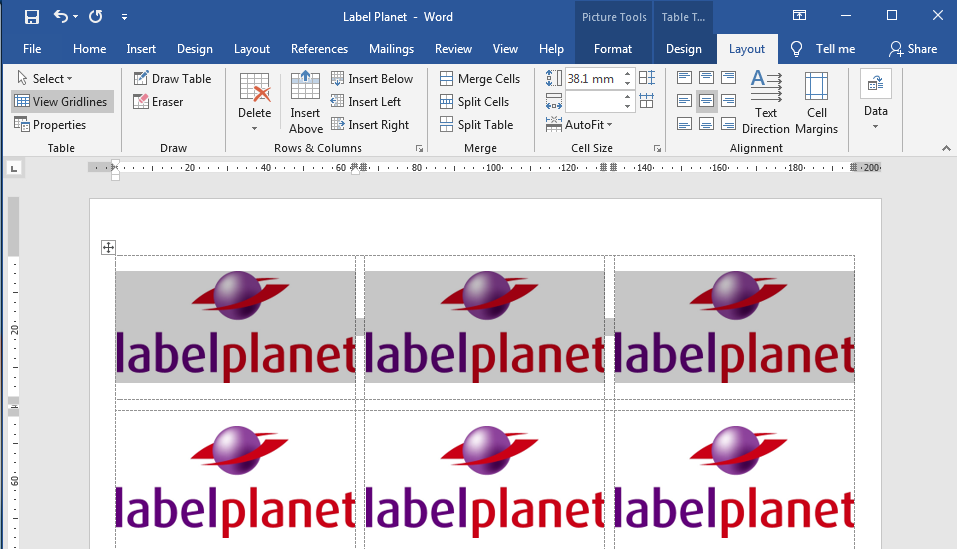
If there are no gaps between your labels, select the entire template and paste your design into all of your labels at once. Move your cursor into the top left label, hold down your left button / trackpad as you move your cursor into the bottom right label, and release the button / trackpad to select. All of the labels in your template should be highlighted with a light grey background to indicate that they have all been selected.
Word Templates With Gaps Between Columns
You need to avoid pasting your design into the blank columns that represent gaps between your labels, so you need to select only the columns that represent labels.
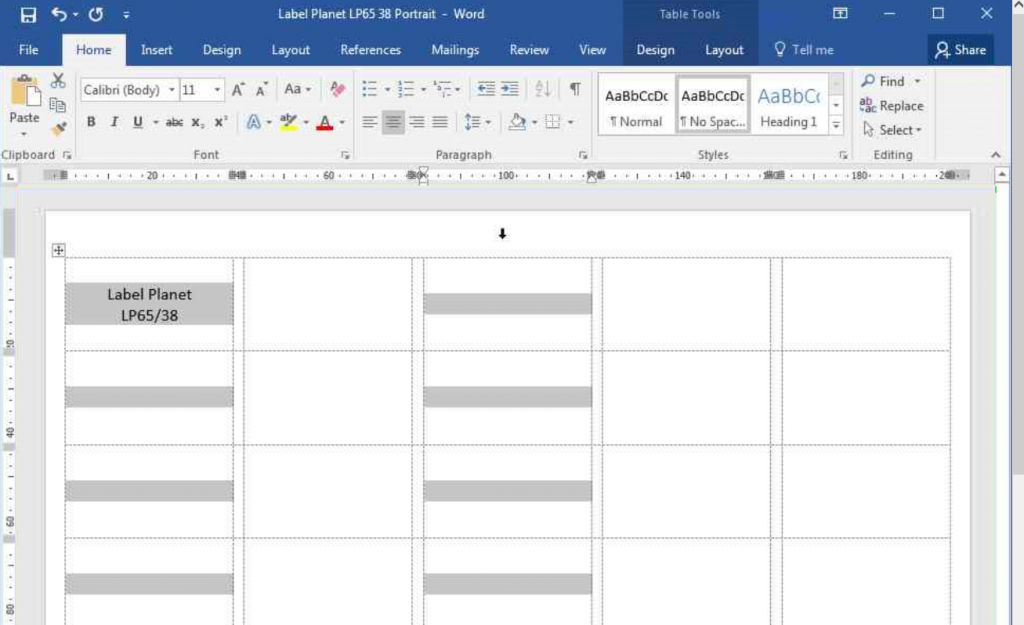
Move your cursor above the first column until it turns into a downward facing arrow. Left click / tap to select the column, which will now be highlighted with a light grey background. Move your cursor above the next column you need to select and hold down the Control key / Command key on your keyboard as you click. You should now see that both the first column and the new column you have selected are both highlighted. Repeat the process for the rest of the columns you need to select and paste your design.

Word Templates With Gaps Between Rows
This is a very uncommon layout; however, you may need to use this technique if you use a standard layout in the landscape orientation. Select the first row by moving your cursor into the first label, holding down the button / trackpad as you move your cursor into the last label in the row, and release to select the row. Repeat this process for the next row down – holding down the Control key / Command key on your keyboard as you select that second row. You should find that both the first row and the new row you have selected are now highlighted with a light grey background. Repeat the process for the remaining rows in your template and paste your design.

Take care to keep your cursor within the last label in the row; if you go beyond the last row, you may end up selecting the blank space outside of the row as well as the row itself.
Word Templates With Gaps Between The Columns & Rows
This is the most complicated layout because you can’t just select entire rows / columns. In fact, if there aren’t too many labels in your template, it may be quicker to simply paste your design into the remaining labels one by one.
If you have got a lot of labels on each sheet, however, you can speed things up by adding your design one by one to all of the labels in the top row of your template and then copying that row and pasting it into the rest of the rows in your template.
- First paste your design into all of the labels in your top row (avoiding cells that represent the gaps between the labels).
- Select the top row; move your cursor inside the first label and hold down the button / trackpad as you move your cursor inside the last label in the row, and release to select the row. Use the copy menu option / shortcut to copy the row.
- Select the rest of the rows of labels in your template, as described in “Word Label Templates With Gaps Between Rows”, and paste in your row of designs.
 Label Planet