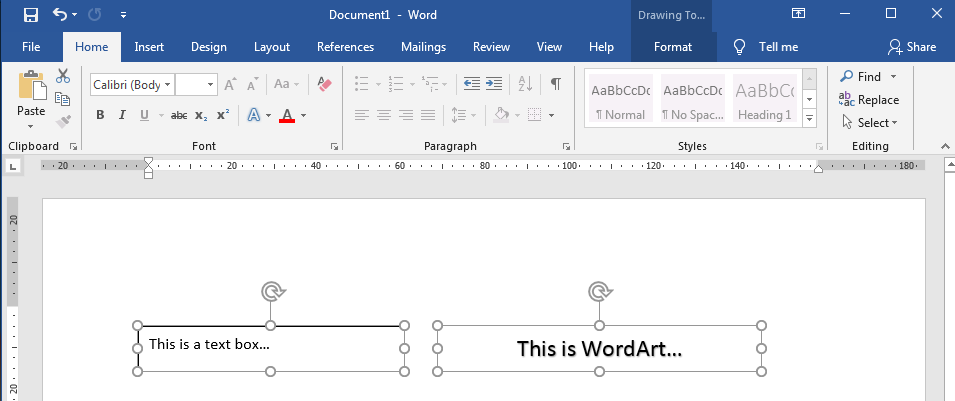
How To Create A Label Design In Word Using Text Boxes & WordArt
How to create text-based label designs using text boxes and WordArt.
What’s The Difference Between Text Boxes, WordArt, & Basic Text?
As we discussed in last week’s Template Tuesday, basic text is simply text that you type directly into Word documents. Text can also be added inside a box (the imaginatively named text box), while WordArt allows text to be added as a standalone self-contained object (without a containing box).
View our How To video for a step by step guide to working with text (and images) in Word label templates.

All three kinds of text can have various styles and formatting applied; with a text box, you can also edit the text box itself (for example by adding a border and/or background), while WordArt allows you to apply more sophisticated styles and effects to your text (compared to basic text).
How Do I Add A Text Box Or WordArt To Word Label Templates?
Both of these objects can be added using the “Insert” tab in the ribbon at the top of the page.
Adding A Text Box
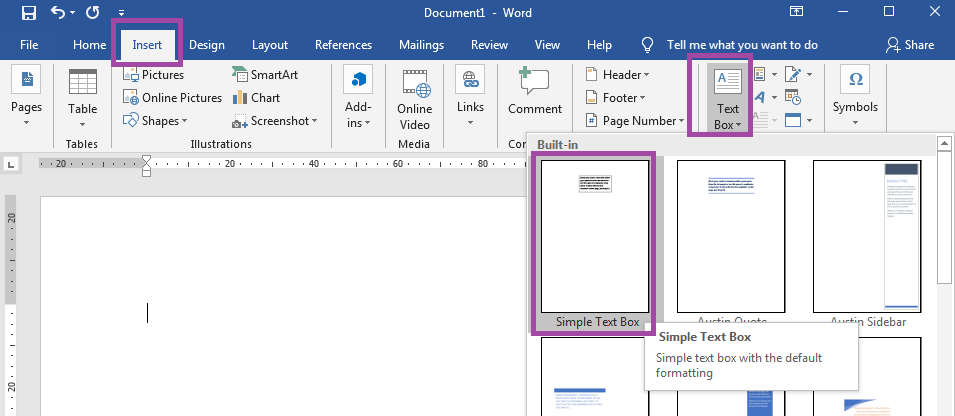
Select the Insert tab and click on Text Box. You’ll see a selection of built-in text boxes, along with the option to draw your own text box.

Generally speaking, the “Simple Text Box” option is the best. This inserts a text box with a white background and a narrow black border. You can format both the background and the border and resize or repostion your text box as you like. Alternatively, click on “Draw Text Box”, move your cursor to where you want to add your text box, click and hold down the left button on your mouse / trackpad and drag your cursor to create a text box. Release the button / trackpad to insert your text box. Like the “Simple Text Box” option, the text box will have a white background and a black border.
Click inside the text box and start typing to add text. Use the sizing handles at the corners and in the middle of each edge to resize it as needed.
We recommend adding text box(es) to the first label in your template before using copy and paste to complete your template. You must select a text box to copy it. Move your cursor so it hovers over one of the edges of the text box; it will become an icon containing a four headed arrow, left click once to select your text box. You can then use the copy icon or keyboard shortcut (Windows: Ctrl + C // MacOS: ⌘ + C) to copy your text box. Select multiple text boxes by selecting the entire contents of your first label (move your cursor into the bottom left corner and triple click quickly) OR by holding down the shift key on your keyboard as you select each text box.
Adding WordArt
Select the Insert tab in the ribbon and then click on WordArt. You will see a number of built-in pre-formatted options. If you like one of these, simply click on the icon to use that formatting. Alternatively, click on the first option to add basic WordArt, which you can then format as you please. Replace “Your text here” with your required text, resize the WordArt using the sizing handles as needed, and positioning your WordArt as required.

As with text boxes, we recommend using copy and paste to replicate WordArt across label templates, rather than trying to insert individual WordArt into each individual label (unless you are creating a set of completely unique labels, of course).
How Do I Format Text Boxes & WordArt In Word Label Templates?
Both objects can be formatted using the Drawing Tools tab. To view these tools, first you need to select your text box or WordArt by left clicking on it once. This adds the Drawing Tools Format tab to the ribbon at the top of the page and gives you access to a variety of formatting tools, including:
- Insert Shapes: use the Edit Shape to add a shape to your text box or around your WordArt. For example, if you want your text to sit within a circle or oval shape, you can add a circular or oval shape within your text box or around your WordArt.
- Shape Styles: use these tools to format the background (fill) and border (outline) of your text box (or add a background and border to your WordArt) or to apply an effect to your text box.
- WordArt Styles: use these tools to format the text inside your text box or your WordArt; you can alter the colour (fill) and border (outline) of your text, as well as apply effects – the Transform option is ideal if you want your text to follow a certain path or slope within your text box or WordArt.
You’ll also find options for adjusting the alignment, positioning, arrangement, and size of your text box / WordArt.
Remember, if you are applying formatting options to the text within a text box, you need to make sure that you have selected all of the text that you want to format.
 Label Planet