How To Select Individual Items Or Groups Of Items In Label Templates
Learn about the different methods you can use to select items in label templates.
Selecting Individual Items
The simple “Point & Click” method works for most items. Point your cursor at the item (so it sits above the item) and (left) click once to select it. On touchscreen devices, you can tap on an item to select it.
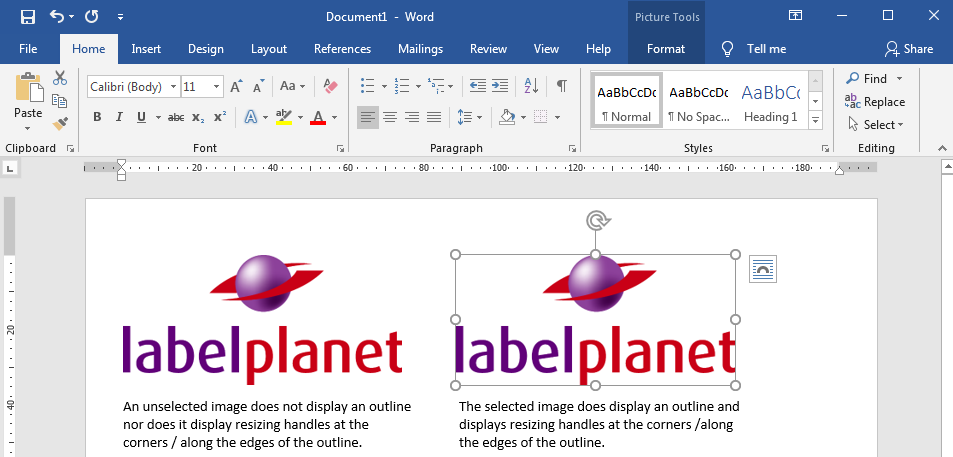
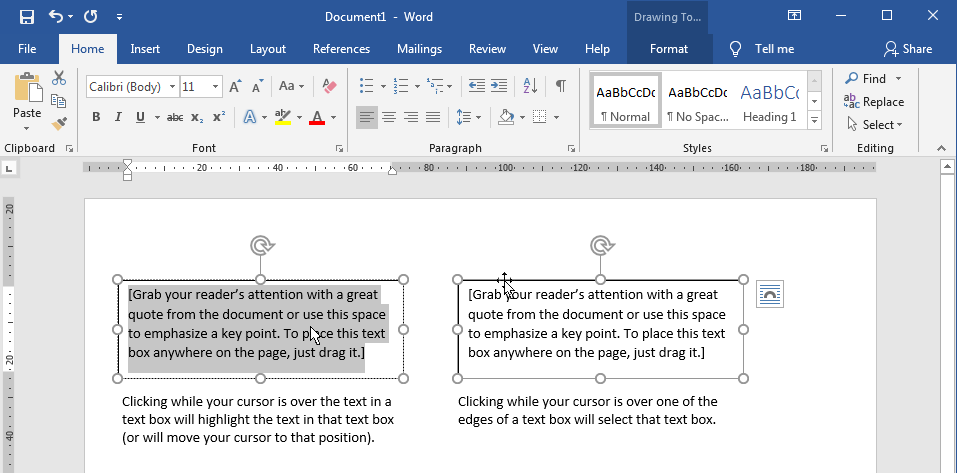
Some items need to be selected in a particular place; these items are usually made up of multiple parts.
For example, a text box is made up of a box AND text inside the box. If you click while your cursor is positioned over the text, Word will move your cursor to that position within the text box. To select the text box itself, you need to position your cursor over one of the EDGES of the box.
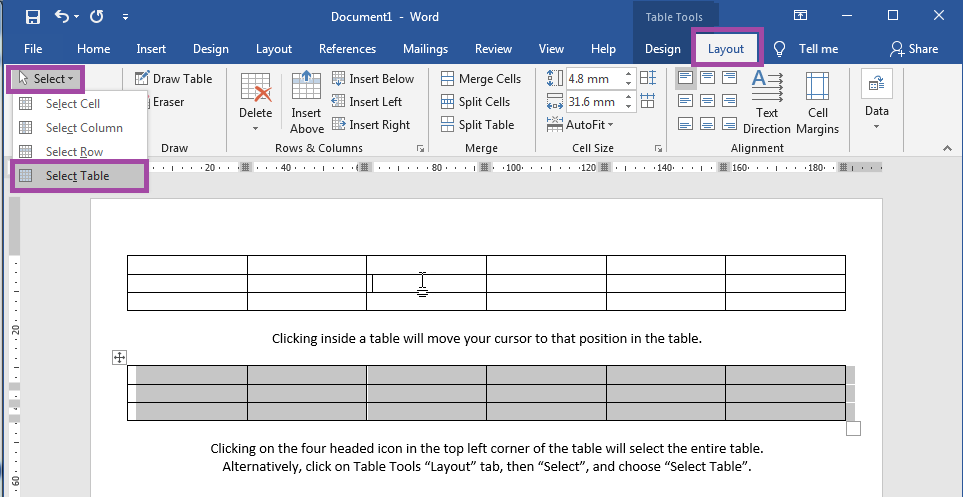
Another example is tables, which are made up of the table itself AND the content you add to the table. If you click on a table while your cursor is inside the table, you will either select an item in the table or move your cursor to that position in the table. To select the table itself, move your cursor to the top left corner of the table; it will turn into a four headed arrow icon and you can (left) click once to select the whole table.
Text also needs to be selected slightly differently. As basic text is not contained within a single element (like a text box), you need to highlight the specific text you want to select. Position your cursor at the start of your text. Click and hold down the left button (or tap and hold down your trackpad) as you move your cursor to the end of your text. Release the button / trackpad and your selected text should now be highlighted by a light grey background.
Selecting Multiple Items
Multiple items can be selected using a version of “Point & Click” or “Highlighting”.
- POINT & CLICK: hold down the Control Key (Windows: Ctrl) or Command Key (MacOS: Cmd / ⌘) on your keyboard as you select each item.
NB: to select images in a group, you first need to change their Wrap Text format from the default “In Line With Text” to “Tight” or “In Front Of Text”. Select your image, then click on the Picture Format tab at the top of the page to find the Wrap Text tool.
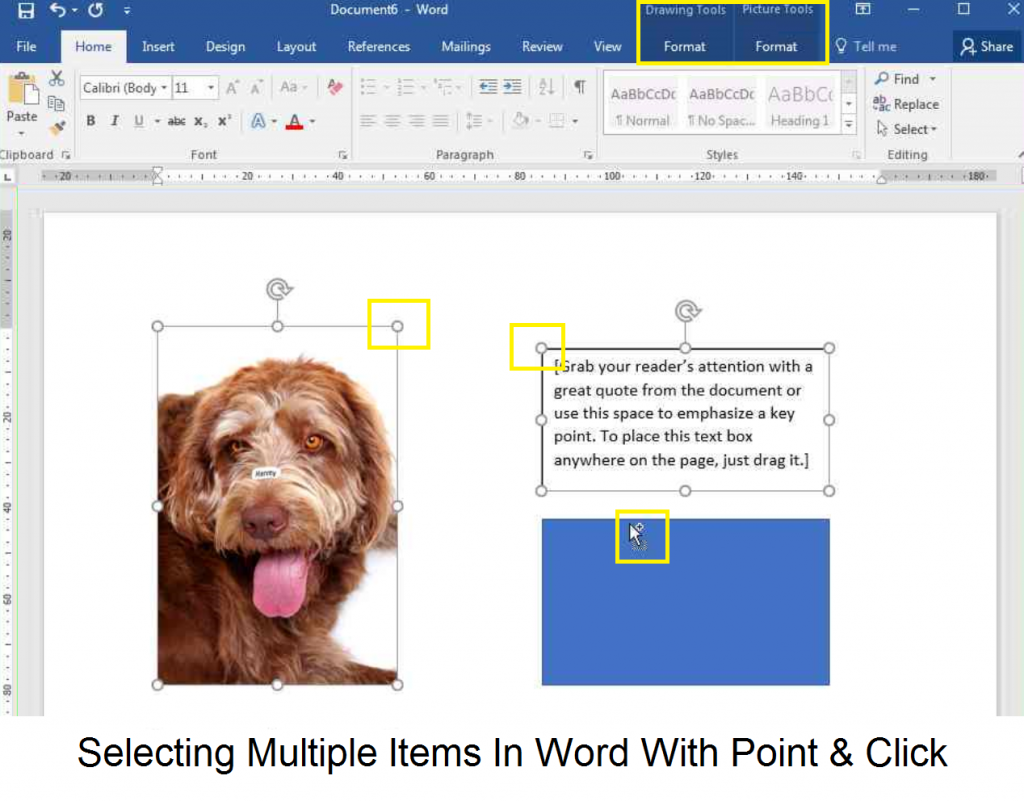 All three items have been selected and are showing an outline with the resizing handles at the corners and along the edges.
- HIGHLIGHTING: use your cursor to establish a square / rectangular area so that all items within that area are selected. Move your cursor above and to the left of the first item in your chosen area. Click and hold down the left button (or tap and hold your trackpad) as you move your cursor below and to the right of the last item in your chosen area and release. This highlights (selects) all of the items within the rectangle or square formed by the starting and finishing positions of your cursor.
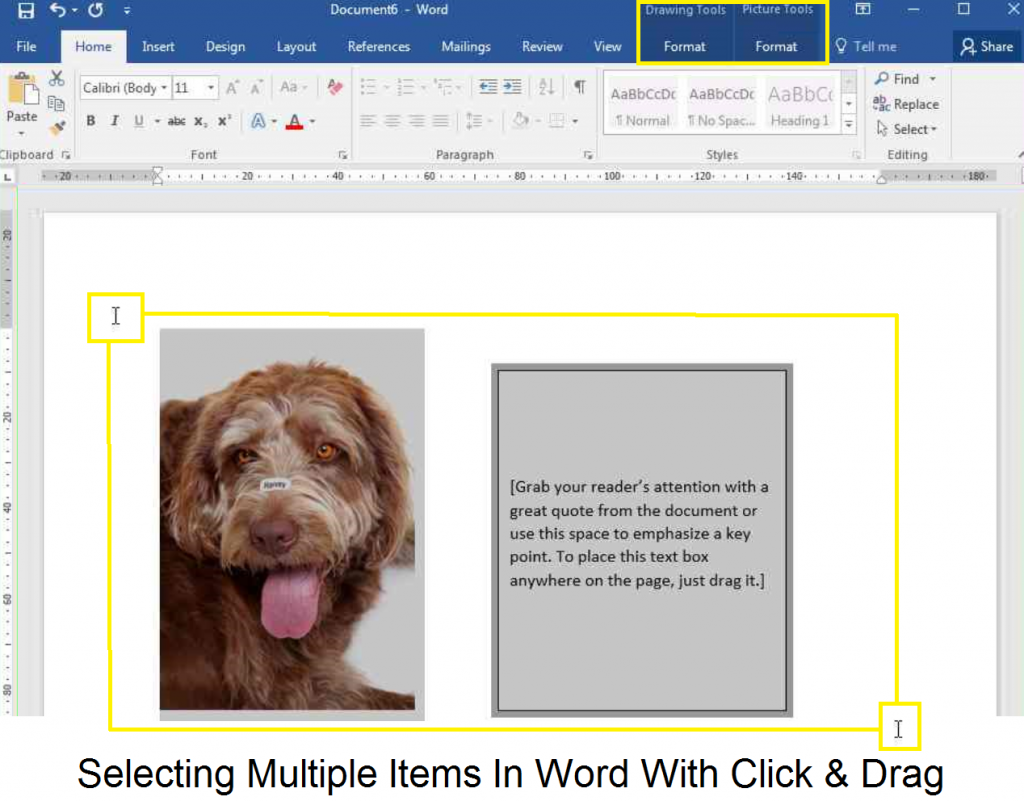 The cursor begins in the top left corner and ends in the bottom right corner of the established rectangular area; all items within that area have been highlighted with a grey background to indicate that they have been selected.
Selecting Individual Labels In Word Label Templates
If you would like to create a set of identical labels within a single template, you can add your design to one label and then copy and paste that label into the other labels. To select an individual label, you COULD use the methods above to select all of the items in your design. The problem with this is it tends to only select the items in your design themselves and not the formatting / layout options you have used to get your label design just right. This can mean that your carefully positioned items end up rearranging themselves when you paste your design into other labels.
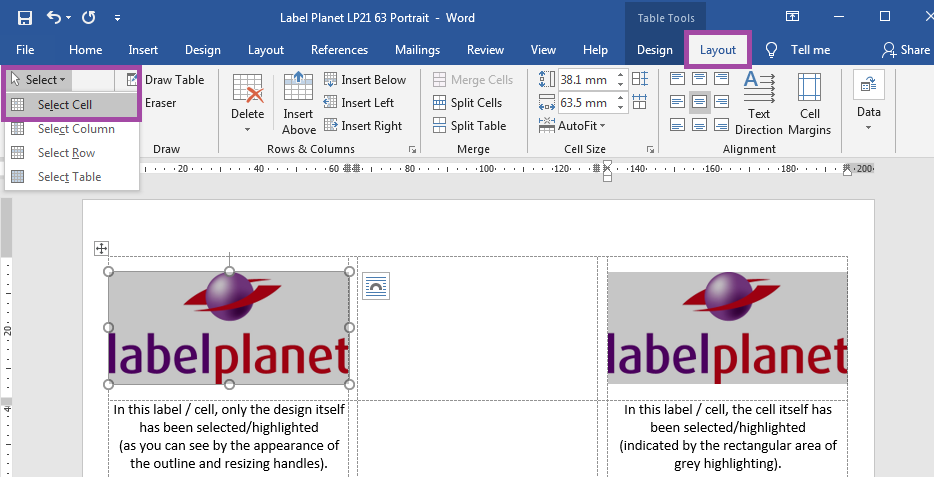
To get around this, you need to select the entire label (i.e. the entire cell of the table). The best way to do this is to move your cursor into the bottom left corner of the label / cell and TRIPLE CLICK the left button QUICKLY.
Alternatively, move your cursor into the cell you want to select. Position your cursor over a blank space in the label and (left) click once. If you don’t have a blank space (because you’ve filled your label with a design), use the arrow keys on your keyboard to move your cursor from cell to cell until you reach the label you want to select. Now, click on the Table Tools Layout tab at the top of the page, choose “Select” from the far left end of the ribbon, and then click on “Select Cell”.
Selecting Multiple Labels In Word Label Templates
To copy and paste designs more efficiently, you can select multiple labels in Word label templates – usually by selecting entire rows or columns.
Selecting columns is the simplest; position your cursor above the column you want to select until it turns into a downward facing arrow and click to select the column. To select multiple columns, hold down the Control (Windows) or Command (MacOS) key on your keyboard as you click to select each new column.
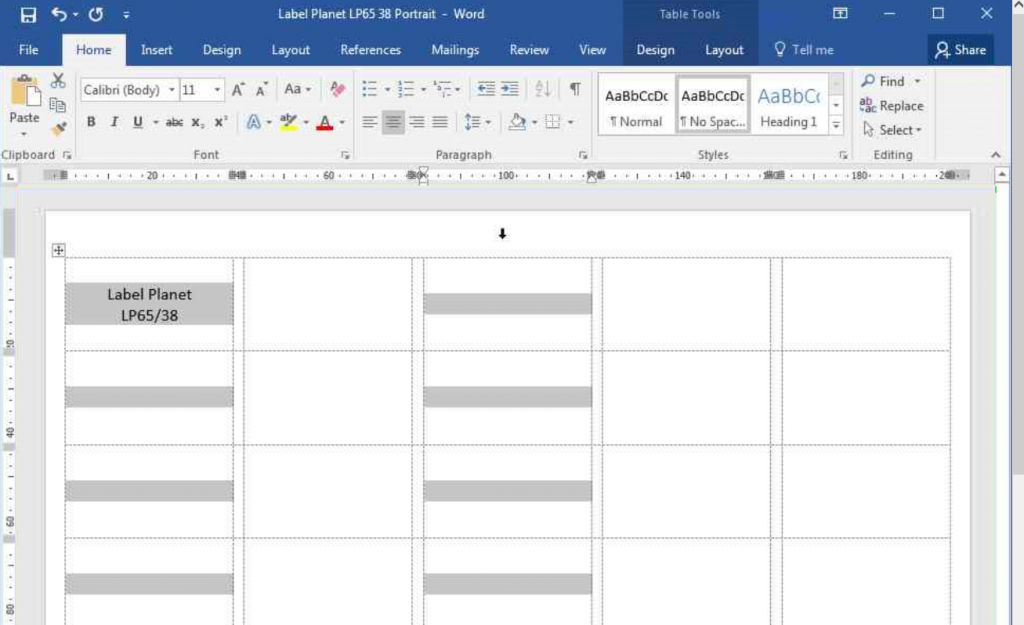
To select rows, you can use the highlighting method described above. Position your cursor in the first label in the row you want to select; click the left button / hold down your trackpad and move your cursor into the last label in the row, and release to highlight the row.
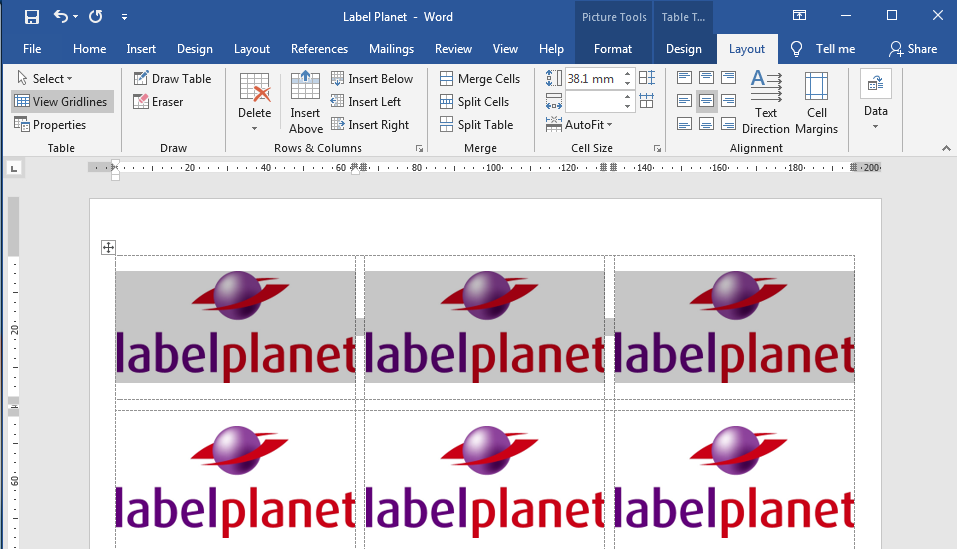
When working with Word label templates, you need to be aware that some of the rows and columns represent BLANK spaces between your labels and not the labels themselves. If you select blank spaces, they will be inserted into your template as new rows / columns when you try to paste your designs – ruining your template.
 Label Planet