How To Reverse Label Designs & Create Mirrored Label Templates In Word For Window Stickers
How to create mirrored label templates for window stickers.
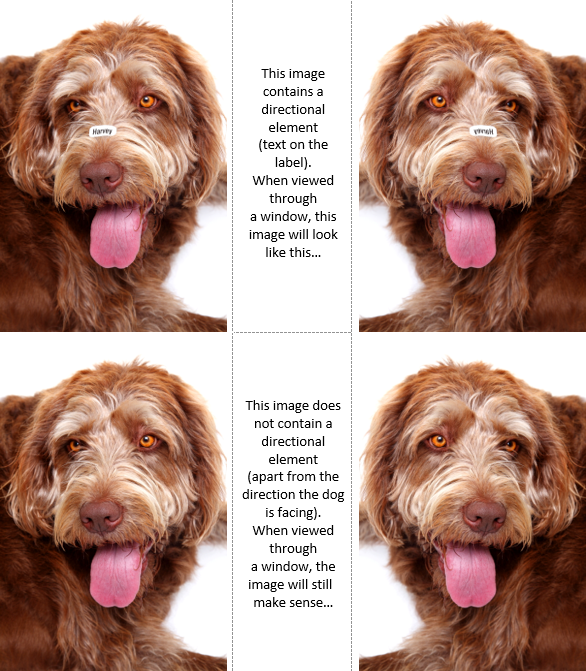
To create window stickers that will be applied onto the inside of a window and viewed from the outside, you may need to reverse – or mirror – your designs to ensure they appear the right way around.
When & Why To Use Mirrored Label Templates
You will only need to use mirrored label templates to create window stickers if:
- your design contains DIRECTIONAL ELEMENTS; this is anything that only looks / reads correctly in ONE direction – like text.
- AND your labels will be stuck onto the inside of a window and viewed from the outside; for example, signs and notices in shop windows (applied inside the shop) viewed by people passing by on the street outside.

How To Create Mirrored Label Templates
There are two ways to create mirrored label templates.
Option One: Use Your Printer’s Print Settings
Some printers / software will mirror or reverse documents during the printing process, which means that you don’t need to do anything differently with your label templates. You simply set up your template as usual and, when you are ready to print, go into “Printer Properties” / “Printing Preferences” and look for a printing option called “Mirror Printing” or “Reverse Printing”. Your template will then be reversed for you and sent to your printer.
Top Tip: we do recommend test printing your template onto paper using this function before printing onto your labels proper so that you can confirm that it does work as you need it to!
Option Two: Reverse / Mirror The Directional Elements In Your Label Design
The tool you use depends on the type of element you need to reverse / mirror…
HOW TO MIRROR / REVERSE IMAGES
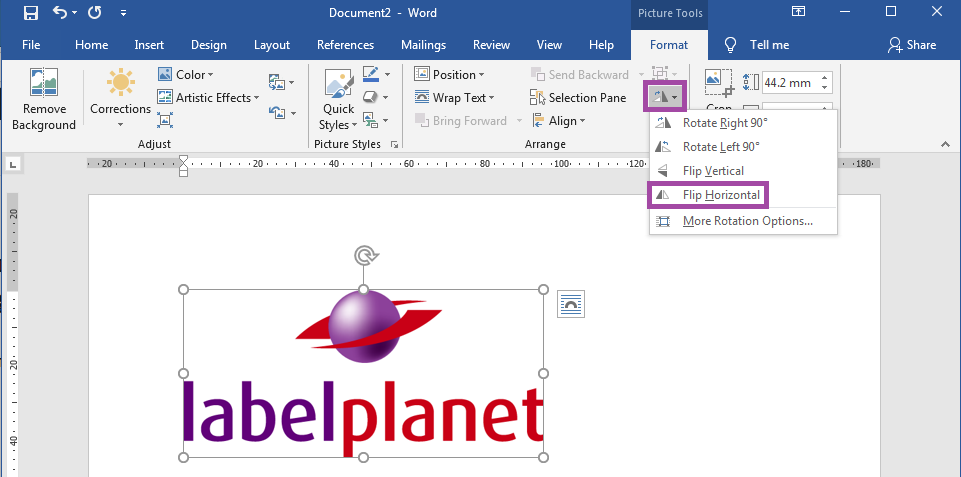
Reverse images using the “Flip” tool. Select your image to bring up the Picture Format tab (for pictures) / Shape Format tab (for shapes) at the top of the page. Select the “Rotate” tool in the “Arrange” section of the Format tab, and select “Flip Horizontal”.

HOW TO MIRROR / REVERSE TEXT BOXES & WORDART
Unfortunately, the flip tool doesn’t work for text boxes and WordArt because it only flips the box / background – and not the actual text. To reverse these elements, you need to use the “Rotate” tool.
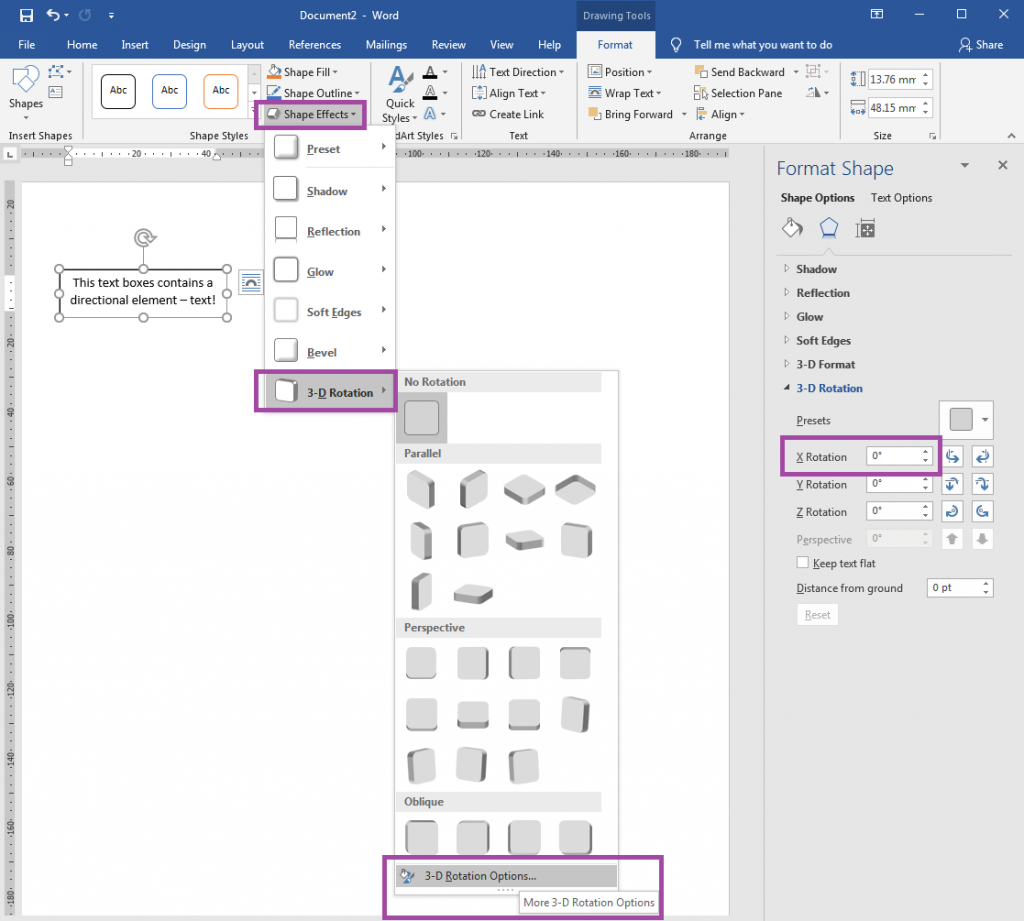
Select your text box or WordArt to bring up the Shape Format tab. Click on “Shape Effects” (to rotate the text AND the box / background) or “Text Effects” (to rotate just the text). Click on “3-D Rotation”, select “3-D Rotation Options”, and change the value of “X Rotation” to 180.

NB: if you are formatting a TEXT BOX using SHAPE EFFECTS, a grey background is added by default. Undo this (or choose a different background) using the “Shape Fill” option in the “Shape Styles” section. To remove the background select “No Fill”.
Word automatically rotates items back to their “normal” state when you click on them to edit the text. To finish editing, click outside of the shape and Word will return it back to its reversed / mirrored state.
Top Tip: if your design is made up of multiple elements, remember you only need to reverse / mirror those that are directional.
 Label Planet